Hello!
Have to seen the totally jaw dropping stamped wall tile project Fran Sherbourne created for us in the August issue of Craft Stamper? You should, it's amazing :)
Of course, some of us may not fancy this level of kitchen transformation, so today we thought we would share an alternative use for the tile stamp Fran has used to such great effect on her kitchen wall!
Fran also created this fabulous tote bag:
The tile stamp used is the same one that was used on the kitchen wall, and in fact it is the exact same design that we have on offer as a giveaway in the magazine! Check out page 49 to see how you can enter :)
So... how to create the bag? Fran has shown us with a series of step by step photos:
Step One:
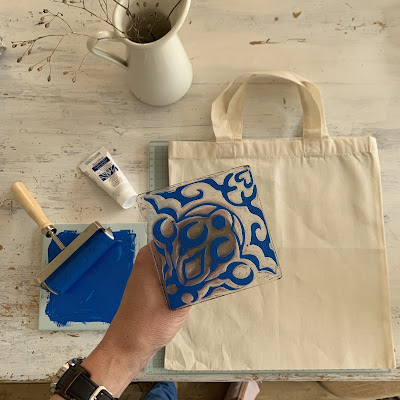
Set out your materials. Any fabric paint can be used to stamp on fabric, or just use regular acrylic paint mixed together with a fabric medium.
Step Two:
Brayer the paint across a glass or ceramic tile.
Step Three:
Brayer the paint across the stamp. Make sure you have a nice even coverage, and you don't have too much paint on your stamp. It's always a good idea to practice on scrap fabric first so you get a feel of how much paint to add!
Step Four:
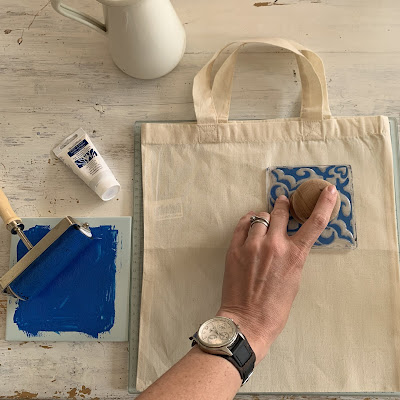
Press the stamp down onto the fabric. Make sure you apply firm even pressure across the whole stamp. This design only requires four stamped impressions so I've done it by eye. You may want to measure out a grid pattern to make sure your images are even and level!
Step Five:
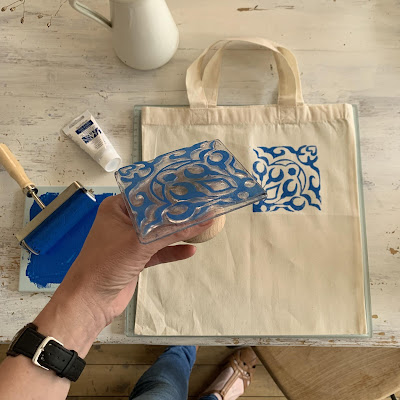
Lift up the stamp directly from the fabric, being careful not to slide it and smudge the wet paint.
Step Six:
Repeat the process and stamp the next image. This stamp is in effect a quarter of the finished tile design, this means the stamp needs to be rotated 90 degrees with each impression. Check to see if the stamp you use needs to be rotated in this way, and again, it's a good idea to practice first to make sure you've got it right before stamping on your finished piece!
Step Seven:
Carry on stamping until the design is finished.
Step Eight:
Remove the stamp and admire your work! Depending on the paint you've used, some designs may need to be heat sealed by ironing to make the finished work permanent. Check out the instructions on your product!
WOW!
We love this idea, and hope you do too!
Check out all the stamps Fran has to offer in her store, Little Stamp Store HERE.
Have a great weekend!


This is awesome ♥
ReplyDeletekyrie 6
Deletejordan outlet
supreme outlet
chrome hearts
golden goose outlet
off white jordan 1
jordan shoes
supreme
goyard tote bag
russell westbrook shoes