Showing posts with label Design Team. Show all posts

Monday, 28 July 2014

Insider Secrets: Chris Dark

Design Team member Chris Dark reviews her favourite stamping product and tells us what she loves most about embossing ink and some exciting ways of using it!


Heat Embossing with embossing ink was one of the first techniques I came across when I started paper crafting, there’s something about watching embossing powder melt on top of an image stamped with embossing ink that’s magical. The formulation of embossing ink is designed to make it sticky and slow drying in order to catch and hold onto embossing powder prior to heating but there are lots of ways of using embossing ink that make it a foundation item for an ink collection.

Have you tried stamping with embossing ink and then dusting over mica powder, chalks or pastels? These products are great for using over both light and dark card and give a lovely rich look to projects. Self colour stamping with embossing ink for subtle interest is great for backgrounds (I’ve found that repeat patterns work well) and on a mid to dark tone of card you get an elegant finish. 

Add an embossing folder and brayer into the mix and there’s another interesting way to put pattern onto card with embossing ink. Use the inked brayer to transfer the embossing ink onto the flat side of an embossing folder and then add coloured ink, mica powder or pastel to highlight the pattern. Embossing ink also works brilliantly as a resist, as well as being an aide for stamping with rubber stamps into hot melted ultra thick embossing powder. The embossing ink acts as a release agent for the stamp once the ultra thick has cooled allowing the stamp to be easily removed.


For my card I initially created a pattern using IndioBlu stamps on black card using the embossing ink to stamp. When the stamping was complete I brushed on Ranger Perfect Pearls powders in cream, gold and blue and dusted off the excess with a tissue to leave a lovely shimmery floral pattern of flowers and leaves on my card. I repeated the process onto a white card blank this time only using the gold powder. Then I assembled the card and embellished with gold cord, dots and lines of relief paste to the centres of the flowers and edges of the leaves. I only used half of the patterned black card that I created so I had some leftover to make a tag.


Above I’ve shown how the stamping looks after applying the mica powder and before cutting my piece for the card. I love the rich effect achieved with this technique which is an old one, but one that gives very pleasing results.

Thanks for looking in at the Craft Stamper blog and have creative day.

To see more of Chris’ work visit www.sketchingstamper.blogspot.co.uk

Monday, 3 March 2014

Announcing our brand new Take It, Make It Challenge Design Team - yaaaaayyyyyyyyyyy!

We had a huge number of entries for our Take It, Make It Challenge Design Team call but, after much deliberation, Trish and I have whittled it down to these nine talented peeps!

Please extend them all a very warm welcome!

Shirley Bamptonhttp://shirley-bee.blogspot.co.uk/


Geradine Carruthershttp://gers-blog.blogspot.co.uk/


Tracy Eassonhttp://queeniesscrapmad.blogspot.co.uk/


Nataliya (aka Frau_Muller)http://fraumuller.blogspot.co.uk/


Linda Walmsleyhttp://www.lindylou-lifeinthecraftlane.blogspot.co.uk/


Renee Zaratehttp://renee-boltonhouse.blogspot.co.uk/


Dot Allan - http://rexbythesea.blogspot.co.uk/


Nikki Killingerhttp://fairyelephantdesign.blogspot.co.uk/


Elizabeth Robinsonhttp://elizabethr-thecraftyrobin.blogspot.co.uk/


Congrats to our new teamies - we look forward to seeing your fabulous creations!

And finally - a BIG thank you to everyone who entered. We are so sorry we cannot respond to all of you individually but we really appreciate the time and effort put into your applications.

Don't forget our challenge is now MONTHLY, so there are even more changes to win! 
Watch this space!

Thursday, 26 September 2013

Please welcome.....

Please welcome a brand new Design Team member to Craft Stamper! I am delighted to have persuaded Anna-Karin Evaldsson to be a part of the Craft Stamper family. Anna-Karin is ridiculously talented and I have to say I've rarely seen a stamper so versatile. And she also scrapbooks pretty darn well too!!!

Here's just a small sample of her gorgeous work!


I hope you'll join me in welcoming Anna-Karin to the team. You can see her first project in the December issue, out on sale on 1st November and more of her fabulous work on her blog.

Katy x

Friday, 17 May 2013

Tutorial for Rub-on Resist Technique By Carol Fox


Hello, Carol here with my blog post for this month.

I have been having a little play with the new Remnant rub-ons available as part of the Idea-ology range. I have always love rub-ons, but I must admit I have in the past sometimes had problems getting some of them to work properly so I had always stuck to the 7Gypsies range. But I have to say the new Idea-ology rub-ons are easy to use and the images come out really well.

I have a sample to share that is based upon the resist technique that Tim Holtz has used on his blog recently. I have gone with a Steampunk theme for my tag.
Step 1


I applied my rub-ons to a size 8 tag, bear in mind that these will resist the ink you apply in the next stage so I tried to think where I would stamp my images before I applied my rub-ons as I wanted to my tag to look quite structured. I found the best way to do this was to lay it out on one tag and then apply the rub-ons to another tag as I removed them.

Step 2


I applied Distress Stain to my craft mat and swooshed my tag through it until I was happy with the coverage. I also coloured a short length of crinkle ribbon with the remains of the colour on the mat to use on my tag.

Step 3


I dried my tag and ribbon with my heat gun and as you can see the colours are a lot more muted now they are dry. You can also see how the rub-ons have resisted the distress stain background.

Step 4


I added some Vintage Photo Distress Stain to the tag by picking the colour up of my craft mat and flicking it onto my tag. I then spritzed with a mini mister, blotted it and heat set. I edged my tag with a black paint dabber and hand drew lines round the edges using a pen and ink.

Step 5


I did all my stamping using black archival ink. I removed the ink from the rub-ons after stamping, by using a very small spot of alcohol blending solution on a piece of kitchen roll and very gently rubbing over the rub-on image. Then I added the various embellishments as shown in the main photo.

I do really like this technique and I can see myself using it a lot, adding in extra elements like stencilling and gesso.

I used the following items on my tag, If you want to see stockists for these please see the post on my own blog where I have a full list.

Rubber Stamps: Stampers Anonymous Time Travelers
Distress Stains: Wild Honey, Peacock Feathers, Broken China, Picked Raspberry, Vintage Photo
Remnant Rubs: Elements, Numbers
Crinkle Ribbon
Alcohol Blending Solution
Film Strip Ribbon
Staples
Metal Number 6
Brads

Thank you for visiting the Craft Stamper blog and enjoy the rest of your day, Carol x


Friday, 19 April 2013

Melt Pot Canvas Tutorial By Carol Fox


Hello, Carol here with my first post on  the Craft Stamper Blog.

I am going to be using the melt pot with a rubber stamp to make a partial image that I will be layering over the same stamped image to add interest and depth to a small canvas. I have personally found that a collage type image works best for this and I try to avoid using one that has to many solid black areas.

This is a great way to introduce yourself to the melt pot if you have not used one before. It only involves a small amount of UTEE and because you work on a small piece of craft sheet as opposed to pouring your UTEE out, it gives you greater control while you get to grips with a new medium.

UTEE gets incredibly hot when it is melted so always be careful when using a your melt pot, if pouring melted UTEE always pick it up by the two handles on the sides and pour keeping the pot well away from yourself on a desk top that you have protected with a heat resistant craft mat. Even when melting your UTEE directly in the pot you do not need to melt a great deal in one go, as it is surprising how far melted UTEE goes. I always use the clear as my base for what ever colour I am going to be using, as this seems to be slightly thinner when melted, and therefore makes the medium more fluid to pour, also the clear is less expensive than the coloured and it makes it all go further.

So without further ado on with my project and I hope it inspires you to use your melt pot in some interesting way. If you do it would be lovely if you shared your makes on the Craft Stamper Facebook Page.

Step 1


Lay an insert into your melt pot. You can buy these, but I have cut my own from an old craft mat that had seen better days. Sprinkle some embossing powder onto the insert; I used clear and platinum. Let this melt.

Step 2


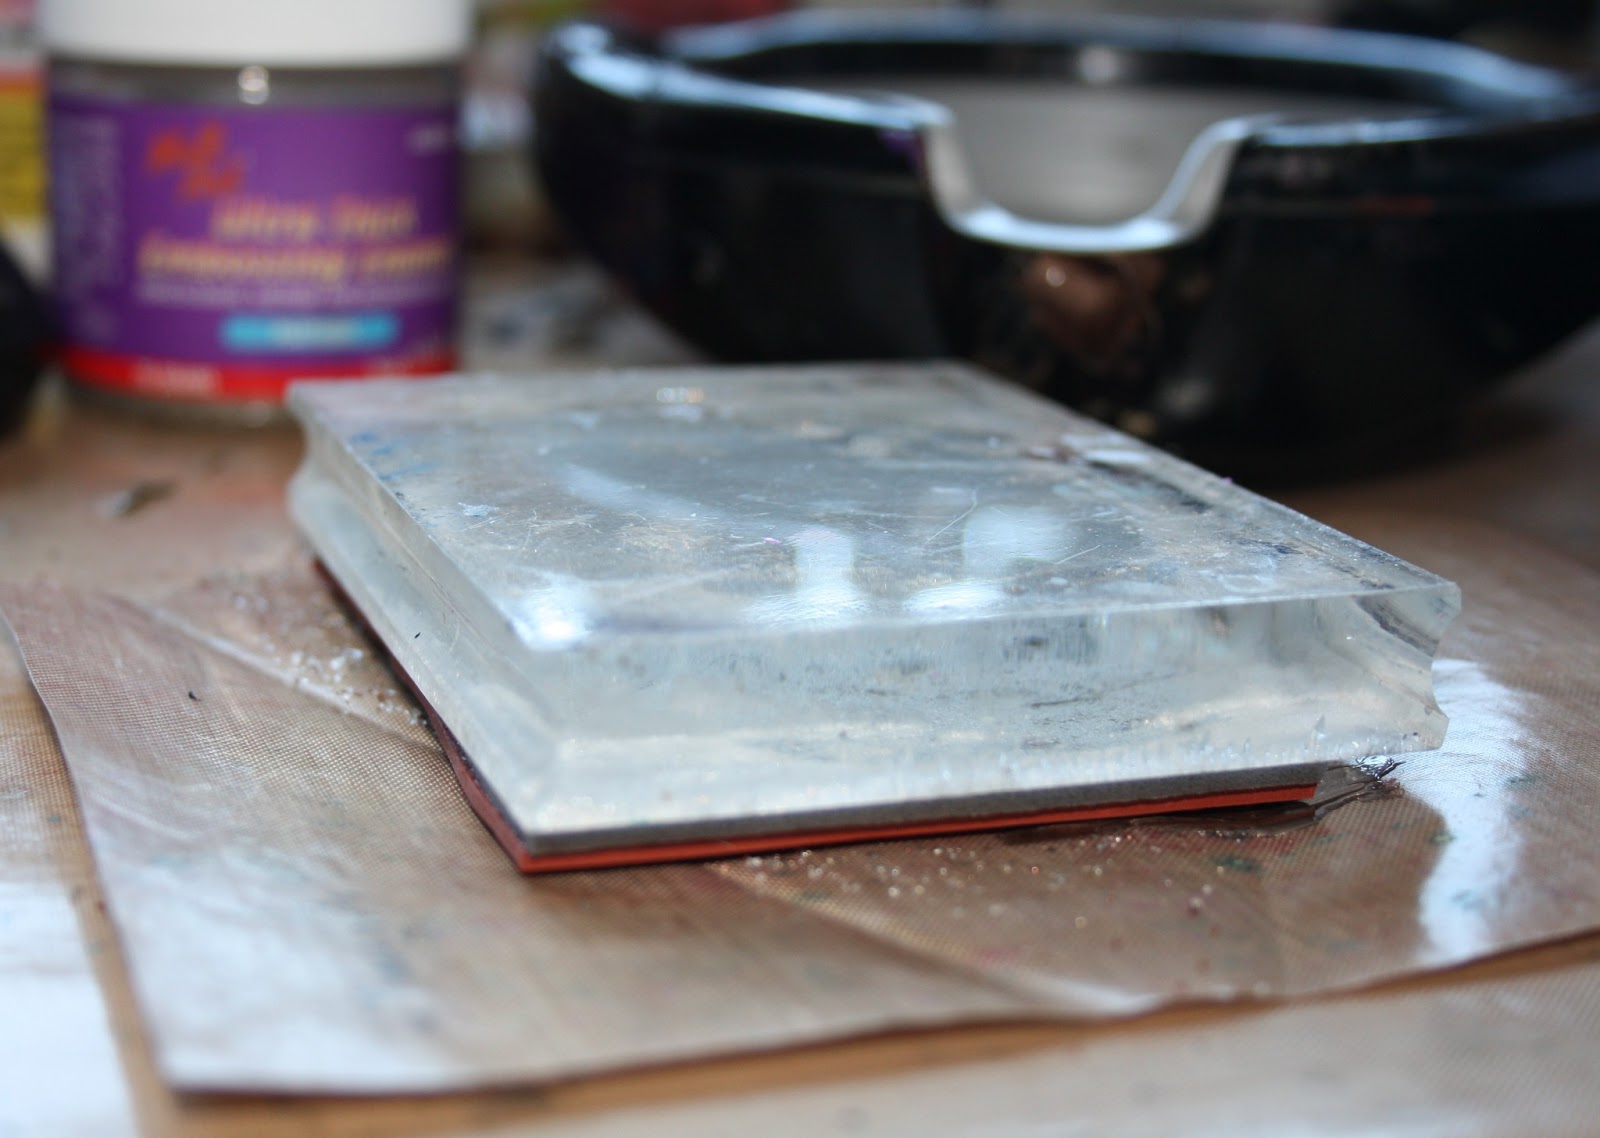
I removed my insert, quickly spread the melted UTEE over an area approximately the size of my stamp and stamped into it. I left my Stamp in place until the UTEE was cold.

Step 3 


When it was completely cold I carefully removed the stamp and then pealed the UTEE image from my insert; do this very carefully as it will be quite fragile. You can see from mine that I have lost part of my image where the butterflies are, I was about to put this back to remelt and do it again, but I decided this will probably work quite well and will hopefully add a bit more interest to my finished item. I also trimmed it carefully around the sides to remove any UTEE that had gone outside of the stamped area, but this is again is a personal choice and depends upon the size of your finished item.

Step 4


As you can see from the main image at the start of this post I am making an ATC sized canvas. It is only a cheap canvas and not very firm to stamp directly onto, so I stamped my image onto tissue paper using black versafine ink and coloured it in on the back using Distress inks. I tore this to size and stuck it onto my canvas using Mod Podge. I added a layer of Mod Podge over the  top of the tissue image and let this dry.

Step 5


I then edged my Canvas with a Black Dabber to tidy up the edges. I then positioned my UTEE piece over the stamped image carefully placing it so that it lined up, glueing it into place with Glossy Accents.

Step 6


I  highlighted the UTEE image with some Treasure Gold and added some around the edge of the canvas to draw it all together. Finishing it as shown in the main photo using ribbon and charms.

I used

Melt Pot
Utee: Clear, Platinum
Crafty Individuals Stamp: CI-337
Versafine Ink: Black
Distress Inks:  Peacock Feathers, Spiced Marmalade and Festive Berries
Treasure Gold: Rose quartz, Renaissance and Sapphire
Small canvas
Tissue paper
Ribbon Scrap
Small Charm

A full list of suppliers can be found on the post on my own blog.

Thank you for visiting the Craft Stamper Blog today, if you do have any questions at all, either leave a comment below or you can contact me via my blog, a link is also in the right hand column.
Carol x

Tuesday, 11 May 2010

Please welcome...

...another new addition to the Craft Stamper DT, Joanne Wardle.

Joanne has appeared as a guest in CS several times, and I thought it was about time I asked her to join the DT proper as she has always produced exceptional quality work and is very punctual too (more important than you might think with deadline after deadline in this business!).

Joanne amazes me with her ability to make her projects look effortless when in fact she employs a great deal of skill. She excels equally at cute, vintage, and elegant styles. I am delighted to welcome her to the team.
I asked Joanne to say a few words about herself and here is what she said:

"I am married with two sons and I live in Leeds. I started cardmaking in about 2003, just after my youngest son was born as an attempt to get into scrapbooking. The scrapbooking never really took off, but I became addicted to papercrafts. The stamping came about a year later and I soon became obsessed with that too.

I have previously done a few pieces of work for craft stamper, but I am delighted to now be an official contributor, and look forward to sharing my ideas. I have a fairly simple style, as I like to make thinks quickly, although my taste in stamps is quite diverse. I love arty, whimsical, quirky and cute! I love all sorts of other crafts, knitting, crocheting, sewing....anything as long as my hands are busy. I work as a a radiographer, a job that I love, but thankfully still gives me time to craft."
To see more of Joanne's work, pop on over to her lovely blog.
Welcome to the team!

Katy x