Tuesday, 3 January 2017

Exclusive Blog Extra: Anna Karin Evaldsson

Hello!
Our fabulous February issue hits the shops this coming Friday... and inside you'll find an amazing project from Anna Karin Evaldsson...


The step out tutorial in the magazine takes you through just how to recreate the wonderful textured heart that adorns the wall hanging. Anna Karin also very generously has shared how the background panel was created, and we are sharing that tutorial today as a special blog exclusive!

Step By Step: Textures Of The Heart Background.


1. Glue a piece of fabric to burlap using Distress Collage Medium Matte. Add a layer of medium on top of the fabric too.


2. Paint some gesso around the edges and here and there, to tone down the colours of the
fabric a little.


3. When the gesso is dry, stamp randomly with a text or script stamp. The stamping will show better on the gessoed areas.


4. Add a tiny bit of paint to the background, so that it coordinates better with the heart
embellishment.


5. Apply Distress Collage Medium Crazing around the edges of the fabric and here and there on the background. Let dry.


6. Rub Festive Berries and Vintage Photo Distress Crayon into the cracks and remove the excess with a slightly moist paper towel.


Thanks so much for sharing Anna Karin!
We love all the texture going in the background, just stunning!


To see the whole article, please check out the February Issue of Craft Stamper Magazine!  


Monday, 2 January 2017

Reader Submissions wanted: Ready Set Stamp

THANK YOU so much for all the fabulous cards submitted for our last art call, it was so hard to choose just a few to publish! We can now announce the next theme.....
We are looking for submissions for our Ready, Set, Stamp feature on the following theme for our May issue of Craft Stamper. If you've always wanted to see YOUR card in print, now is your chance!! 


Colours: Cadbury Purple, Fuchsia, Dark Lime, Bright Aqua.

Deadline for submission: 24th January 2017

· Please email your submissions to: editor.cs@mytimemedia.com
· Please put 'Ready Set Stamp' followed by the theme in the subject line
· Please note that due to the number of submissions it's not possible to contact every entrant individually - if you have not heard from us within one week, your submission has not been successful. Please try again with a different card!

Guidelines:
· Please make cards only for this gallery.
. NEW work only please, we do not accept cards that have been published elsewhere (including online) before submission.  
 . Please do not use stamps that are discontinued for this article.
. We do not accept cards ONLY created with digital imagery for this feature. Digital imagery is welcome, but  MUST be used in conjunction with rubber/polymer stamping to qualify.
· Cards which are selected need to be posted to the Craft Stamper offices in the UK. The cards will be returned, along with a complimentary issue of the magazine.
· This call IS open internationally.
· Note that we do choose artwork as it arrives, so please don't wait until the last minute to submit if your cards are ready.
· Please follow both the theme AND the colour scheme when creating your cards. You can add black, white and metallics to any of the schemes. The ideas given are simply that, ideas, and do not have to be followed to the letter!
· Text for this article is required (don't worry - it is short!) and should be entered into the document provided – this will be sent to you if you are selected.


We look forward to seeing all of your beautiful designs!

Our Fabulous February Issue hits the shops this Friday!

The fabulous February issue of Craft Stamper Magazines will hit the shops this coming Friday (6th). Subscribers will be receiving their copies very soon, if not already :)


Some would say February is the most romantic month of the year, with Valentine’s day a time for celebration. Personally, I would say EVERY month should be romantic if you like that sort of thing! I would absolutely say that the ‘typical’ romantic imagery of hearts and flowers can be used all year round. So, we have included lots of hearts and flowers in this issue! Projects that could be Valentine in nature should you wish, but would be perfect at any other time of the year too.

Anneke De Clerck is sharing a wonderful project on page 48. These free standing, stamped hearts would make an amazing home decor talking point for any mantlepiece.


We also have a wonderfully textural Valentine from Georgie Connelly. In non-traditional Valentine colours of teal, this is simply stunning. Check it out on page 6.


I’m sure Gesso is a staple in the stash of many of us. In this month’s Masterclass, Tracy Evans shares five different techniques of using it, a really good way to get the most from the products you already own. The finished art is a riot of colour and texture, just gorgeous. Have a look for yourselves on page 70.


We have four very different free images this month. Hearts feature in there (of course!), with a doodle heart and a cute kitty cat drawn by me. Chris Dark has drawn the stupendous rose heart, and we’re so thrilled that talented digi designer Teri Sherman is kindly sharing her Peacock Butterfly with us! Tracy Evans has used the butterfly to amazing effect for us!


We also have an wonderful Love Angel by Brenda Brown..


some amazingly detailed altered Altoid tins in our 3D Challenge, including this sneak peek from the creation by Louise Crosbie:


and a gallery full of ‘Sentimental Memories’ themed cards in this issue! Lots for you all to experiment with, and don’t forget, I would love to see what you create! Email me, or share on our Facebook page!

So, where can you get your hands on a copy of the magazine?
For subscriptions, please go to: www.craftstamper.com
For single print issues : www.mags-uk.com
For digital issues, both subscriptions and single issues: www.pocketmags.com

Have a wonderfully crafty month everyone!


Friday, 30 December 2016

Take It Make It Challenge: December Winners!

Hello everyone!
We are so pleased to announce the winners of our December Challenge: Take A Theme: Snow And Ice!

As you all know, we have two winners to announce today, so without further ado, let me introduce you to the Design Winner.....

Entry Number 24: Amanda


We loved this atmospheric winter panel! So much texture and detail... you need to go check out the detail pics on Amandas blog! Amazing! Amanda will win a Guest Designer slot here on the blog, her very own Winners Profile, and of course her amazing art will be featured in it's own 2 page spread in Craft Stamper magazine! Congrats !

We also have the remaining top slots to announce!

The remaining Top Three are:

Entry number 34: Marjut
Entry number 50: Karen

Wonderful projects ladies!

We now need to share the randomly chosen winner with you all!
This winner will recieve the prize offered by our sponsor this month:


The prize this month is this fabulous Craft Box selection, a wonderful bundle of goodies!


Congratulations to our winner:


      Congrats Jannet, I think you'll have a wonderful time creating with your prize!

Winners, you need to need to get in touch with me in order to claim your prize!  Please email me at: editor.cs@mytimemedia.com , and put TIMI Winner in the subject line, then I'll be sure to spot it! 
Top Three Design Winners, also please contact me if you wish to receive a button to display on your blog.


Our January challenge will be launched next Friday, January 6th.
We can't wait to see all the wonderful art you will all be sharing!

Friday, 16 December 2016

Take It Make It Challenge: Winners Profile

Hello!

Welcome to our Winners Profile, showcasing the Design Winner of our last Blog Challenge!

The very talented Design Winner of our November 2016 challenge is

Hannah Oxberry


Hannah won the challenge with this fabulous art panel! We loved the effect of the stamping into the background, and the pop of red is amazing!


We asked Hannah a few questions all about stamping (well, we are Craft Stamper after all!)


Q: How long have you been a stamper, and how did you get started?

A: I have been stamping for about 3 years now, firstly using them in my jewellery designs before moving on to include it in my artwork.


Q: What are your favourite kinds of stamps, and do you have a favourite stamp company?

A:  I love to use simple stamps with clean lines and strong design features. My favourite stamp companies include Stampendous! And IndigoBlu.


Q: Describe your style, are you a messy kind of stamper or a more ‘clean and simple’ kind of person?

A: If I had to describe my style I would say it is quirky but with a feminine edge.


Q:What kind of projects do you like creating the most?

A: I enjoy working with mixed media projects, using stamps to create interesting effects and adding details to embellishments.


Q: Apart from stamps, what is the one product you wouldn’t be without when you craft?

A: Choosing just one product, aside from stamps, that I wouldn’t be without be without for my craft work is so hard! I love to use a whole host of different mediums when I create!


We also asked Hannah to show us a couple of her favourite stamped creations,  and share why she likes them so much. Here are the gorgeous projects she has chosen:


"This Love Letters tag, really encompasses my style – quirky and grungy, this was the first piece that gained lots of lovely feedback and really gave me a boost" - Hannah


"Bright and bold, I love the contrast of colours in this piece" - Hannah


Congratulations on being our November Design Winner Hannah , and it was lovely to learn a little more about you!


Do YOU fancy having a winners profile all about you on the CS blog? 

The profile is part of the prize package for each Design Winner of our challenges. All you need to do is enter a creation into the challenge, then if you are voted Design Winner everyone will be reading all about you before you know it!


Our current challenge 'Take A Theme: Snow and Ice' is open until December 28th, so still lots of time to enter! Don't forget the fabulous prize, the bundle of Craftbox goodies!

  All the details can be found HERE.


Thursday, 15 December 2016

Throwback Thursday!

It's Thursday... time for a little Throwback! Every Thursday we will be sharing a wonderful project from a past issue of Craft Stamper Magazine.... a full step by step tutorial for you to feast your eyes upon! As a new project for our newer readers, or a reminder for those who have been with us a while... it's sure to inspire!

This week, we have the talented Clare Buswell sharing a project first published in December 2014. A fab tutorial on creating your own stamps... a brilliant art project you could get the children involved in, and of course the stamps you create don't have to be festive! We love the card Clare created:


Clare says: 

I really love how simple and affordable these stamps are to make. I had lots of fun experimenting with different designs. It’s very easy to cut the craft foam and the stamps are much easier to use when mounted onto foam core. Once you’ve made these stamps, children would love using these to make their own Christmas projects too!


Cutting shapes from craft foam is a fun way to create bold and simple stamps. Craft foam is readily available from most art and supply shops and is very affordable. I really like the technique because it’s a quick way to create your very own custom stamps.

Once you’ve decided what design you’d like to turn into a stamp, it’s very easy to transfer it onto the craft foam using tracing paper and a bone folder. The craft foam is very easy to cut with a sharp craft knife or scalpel on a cutting mat. The craft foam stamps well with a variety of inks but I did find pigment ink gave the best results.

The sheets are usually quite thin so it’s best to mount them onto something rigid. I used some lightweight foam core, available from most art supply shops; it makes the stamps much easier to handle and adds some extra cushioning when stamping. If you don’t have any foam core you could also try using some corrugated cardboard!

Materials
Stamps Clare used...
Waltzingmouse Stamps: Seasonal Remedies

Other materials...
StazOn Ink: Jet Black
Memento Luxe Inks: Pear Tart; Love Letter
Craft foam sheet
Foam core
Baker’s twine
Card: white; green
Craft knife
Hole punch
Tracing paper
Bone folder
Foam pads
Silicone glue

Step By Step Instructions:

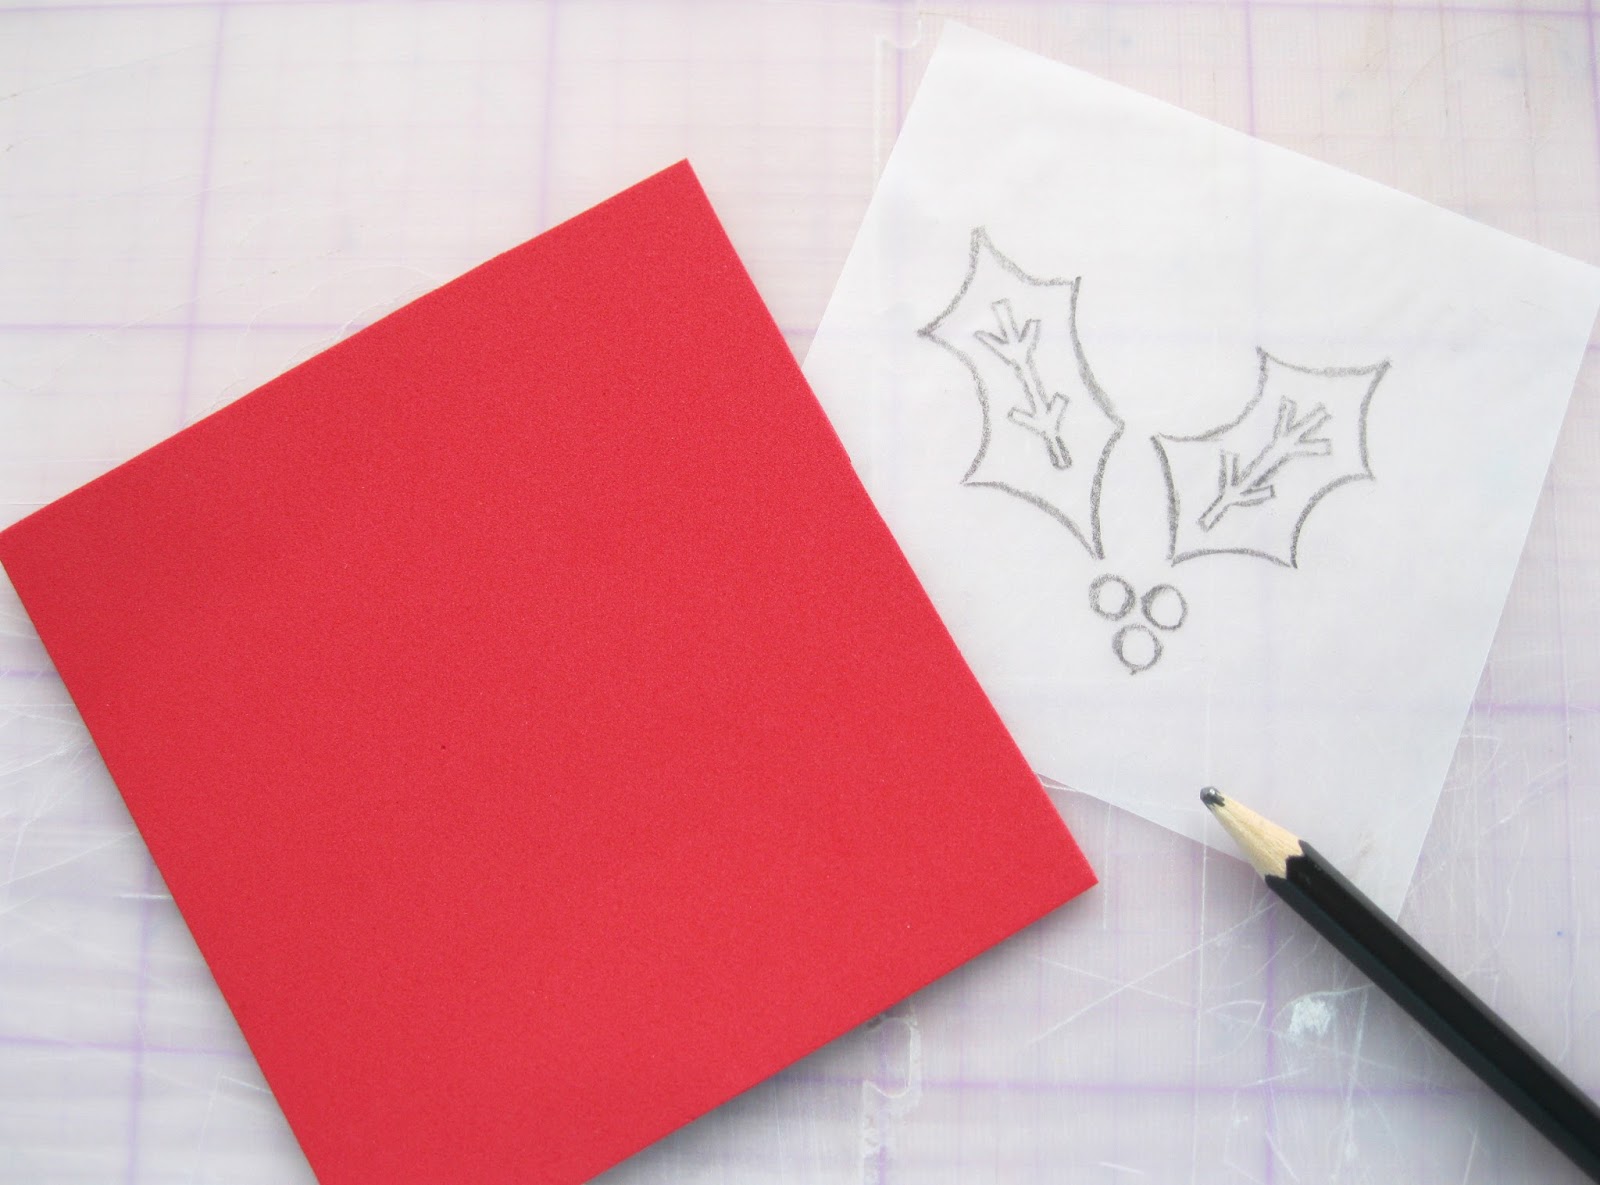
1 Draw your design onto some tracing paper with a pencil. It’s best to keep the shapes fairly simple until you become more experienced with cutting the craft foam.


2 Using a bone folder, transfer the design from the tracing paper onto the craft foam. Rub firmly along the lines using the bone folder. The lines should transfer quite clearly.


3 Using a craft knife or scalpel cut out any details from the centre of your stamps first. Then cut along the outlines to cut out the rest of the shape.


4 Small circles can be difficult to cut out perfectly using a craft knife so I cut out the berry stamps using a hole punch.


5 Glue the craft foam shapes onto small rectangles of foam core. Once dry cut away any excess foam core around the edges of the stamp, as shown.


6 Stamp your holly stamp in a repeat pattern to create the background paper for your card.


To finish the project:

Once I had stamped the background paper, I stamped an extra holly leaves image and fussy-cut it out. I covered my card base with some green card and added some baker’s twine. I layered the stamped background onto my card base using foam pads for some extra dimension. I stamped the sentiment onto a strip of white card and attached this across the card blank. To finish I added the fussy-cut holly using silicone glue.


Thanks Clare!

We will have more Seasonal Throwback Thursday projects to share over the next couple of weeks, so don't forget to check back!
Happy Crafting xx